If you’ve got old furniture gathering dust, why not give it a fabulous makeover? DIY projects can turn those worn-out pieces into stunning treasures, reflecting your style. It’s budget-friendly, sparks creativity, and gives you that proud feeling of accomplishment. Just a little paint, some cool hardware, or a fun fabric can completely change the vibe. Plus, who doesn’t love a good before-and-after story? Stick around, and you’ll discover even more tips and ideas to transform your space!
Key Takeaways
- Transform old furniture by painting, reupholstering, or adding unique hardware for a fresh look and personal touch.
- Assess the condition and potential of furniture pieces to ensure a successful makeover and preserve their stories.
- Use essential tools like paintbrushes, sandpaper, and quality primer for a smooth, professional finish in your projects.
- Explore budget-friendly options at thrift stores and online platforms for inspiration and affordable materials.
- Regular maintenance, like dusting and applying new finishes, keeps your revamped furniture looking vibrant and lasting longer.
Why You Should Consider DIY Furniture Makeovers

When you think about sprucing up your home, DIY furniture makeovers can be a game changer! Imagine transforming a dull, old piece into something fresh and fabulous. Not only does it save you money, but it also lets your creativity shine. You can choose colors and styles that reflect your personality, making your space truly feel like yours. Plus, there’s a special thrill in saying, “I made that!” when friends come over. It’s like giving your furniture a second chance at life! And let’s be honest, who doesn’t love a good before-and-after story? So grab your tools and let your imagination run wild—your home deserves it, and you’ll have a blast doing it!
Assessing Which Old Furniture to Revamp
Before diving into your DIY furniture makeover adventure, it’s important to take a step back and assess which pieces are truly worth revamping. You want to choose wisely, so here are some tips to help you decide:
- Condition: Look for sturdy pieces. If it’s wobbly or cracked, it might not be worth the effort.
- Style: Does it have potential? A classic shape can shine with the right updates.
- Sentimental Value: Is it a family heirloom? Revamping can keep memories alive.
- Functionality: Can it serve a new purpose? Think creatively—an old dresser could become a chic TV stand!
Trust your instincts, and remember, every old piece has a story waiting to be told!
Essential Tools and Materials for Your Makeover
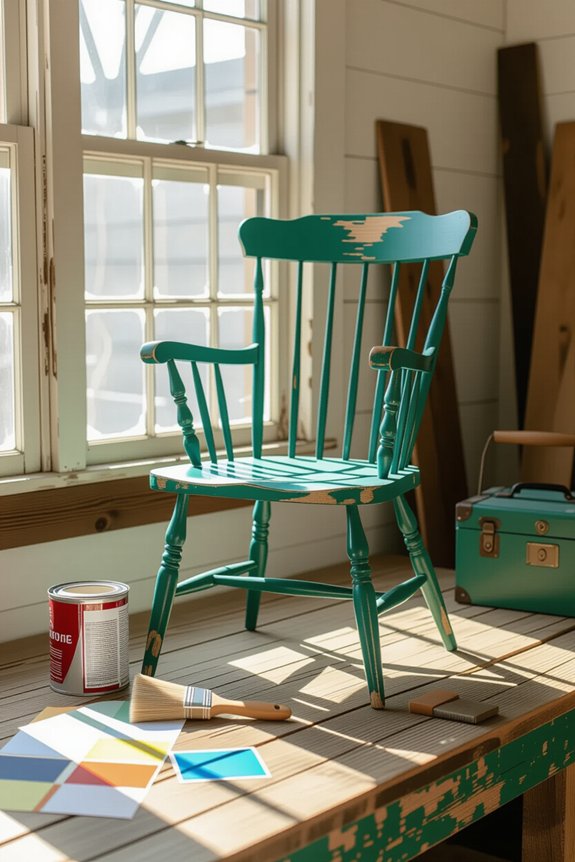
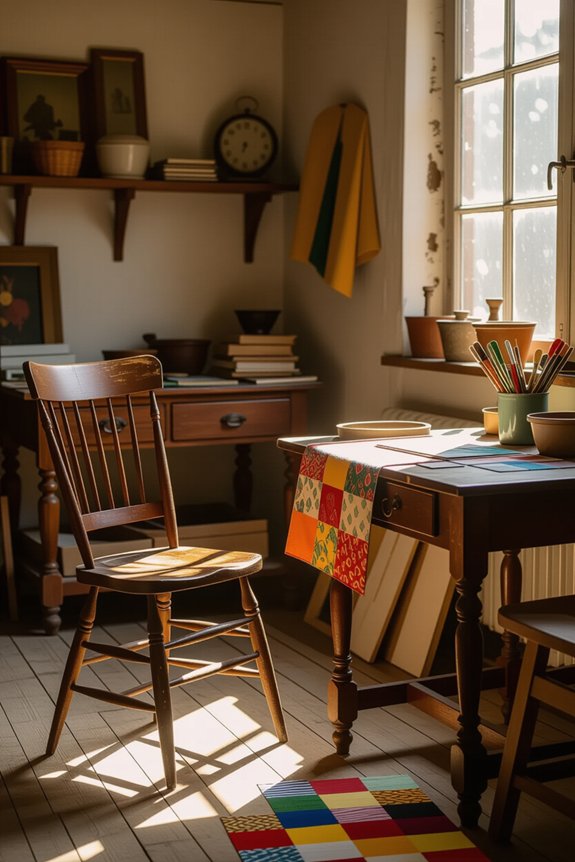
Starting your DIY furniture makeover is like opening a treasure chest filled with possibilities! To begin, gather some essential tools and materials. You’ll need a trusty paintbrush, sandpaper, and a good-quality primer. Don’t forget a roller for larger surfaces—it’s like magic! A drop cloth will save your floors from paint splatters, and some painter’s tape will help you create clean lines.
For a pop of color, stock up on your favorite paint or stain. You might want new hardware, like knobs or handles, to give your piece a fresh look. Finally, grab some rags for quick clean-ups. With these tools in hand, you’re ready to transform that old furniture into something fabulous, so let your creativity shine!
Preparing Your Furniture for a Makeover

Preparing your furniture for a makeover is like giving it a fresh start, and who doesn’t love a little makeover magic? Before you get started, take a moment to get your piece ready. Here’s how you can do it:
- Clean it up: Dust and wipe down your furniture to remove any dirt or grime. It’ll help the new finish stick better.
- Inspect for damage: Check for scratches, dents, or loose parts. Fix those little issues now to avoid headaches later.
- Sand it down: Lightly sand the surface to create a smooth base. Think of it as exfoliating for your furniture!
- Prime if needed: Use a primer for better paint adhesion, especially on tricky surfaces.
Now you’re all set for your fabulous transformation!
Choosing the Right Color Palette for Your Projects
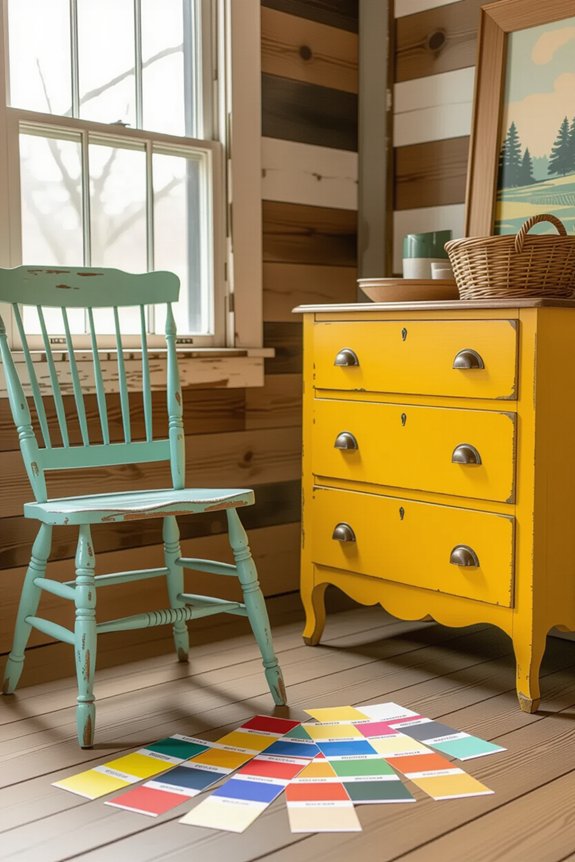
Once your furniture is all cleaned up and ready for its big reveal, the fun really begins—picking the perfect color palette! Think about the mood you want to create. Do you want a cozy, warm vibe or something bright and energetic? You might love soft pastels for a calm feeling or bold colors for a fun pop!
Don’t forget to take into account your space. If your room is small, lighter shades can make it feel bigger. Looking for inspiration? Check nature, art, or even your favorite clothes! Grab some paint swatches and play around. Remember, it’s about what makes you happy. Trust your instincts, and don’t be afraid to mix and match. Your furniture makeover will shine with your unique touch!
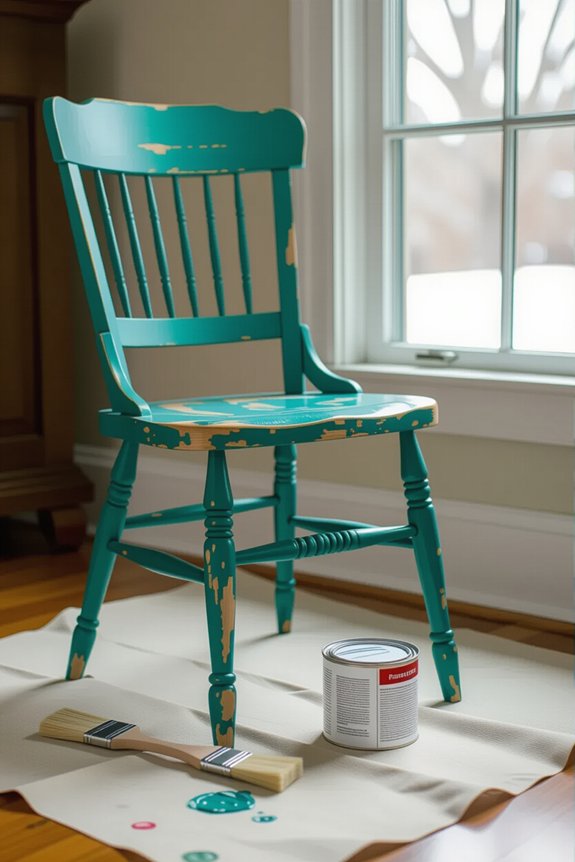
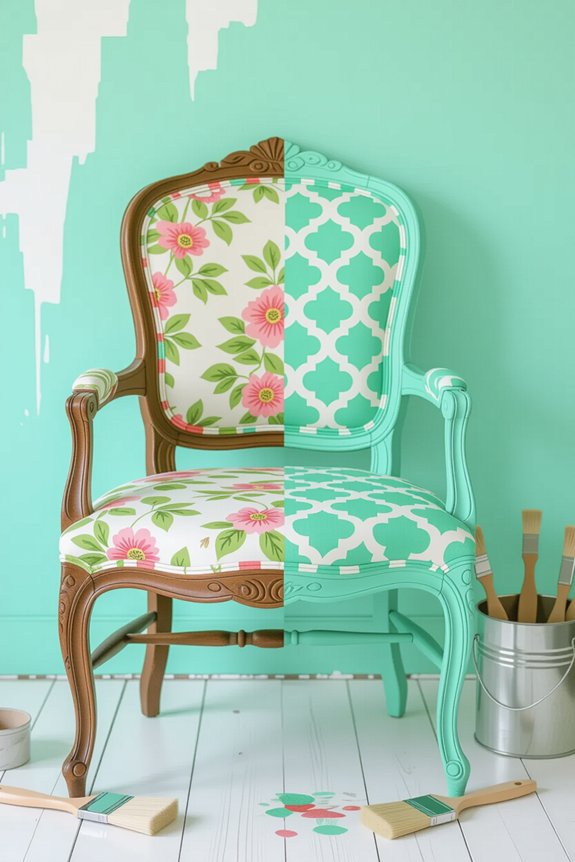
DIY Painting Techniques to Enhance Your Furniture
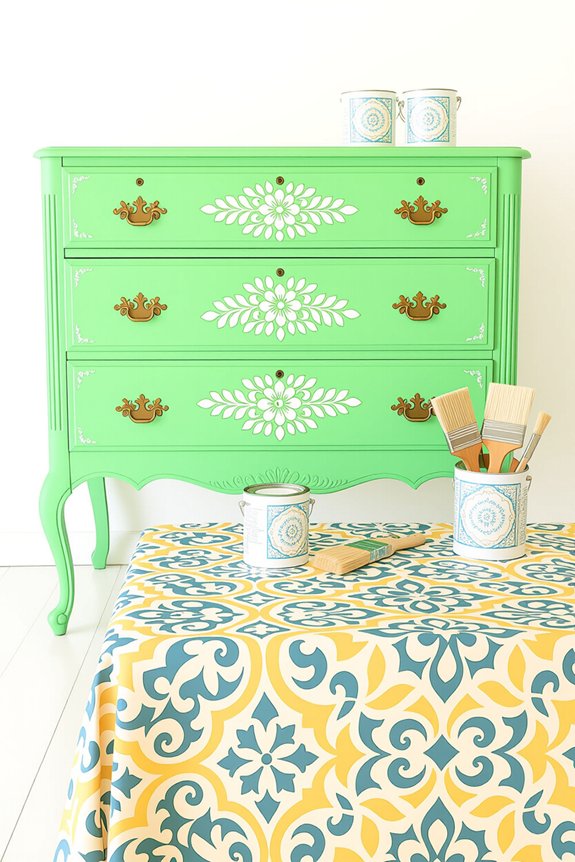
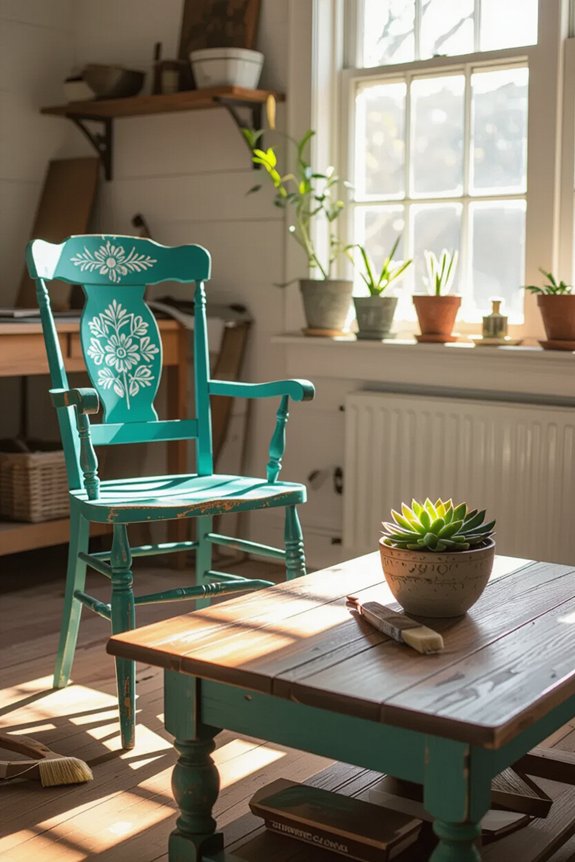
When you think about giving your furniture a fresh look, painting can be one of the most exciting ways to transform it! With just a little creativity, you can breathe new life into old pieces. Here are some fun painting techniques to try:
- Chalk Paint: This gives a matte finish and is super easy to distress for a vintage vibe.
- Ombre Effect: Blend colors from dark to light for a stunning gradient that catches the eye.
- Stencils: Use stencils to add patterns or designs, making your piece uniquely yours.
- Spray Paint: Quick and fun, spray paint is perfect for a smooth, even coat on intricate details.
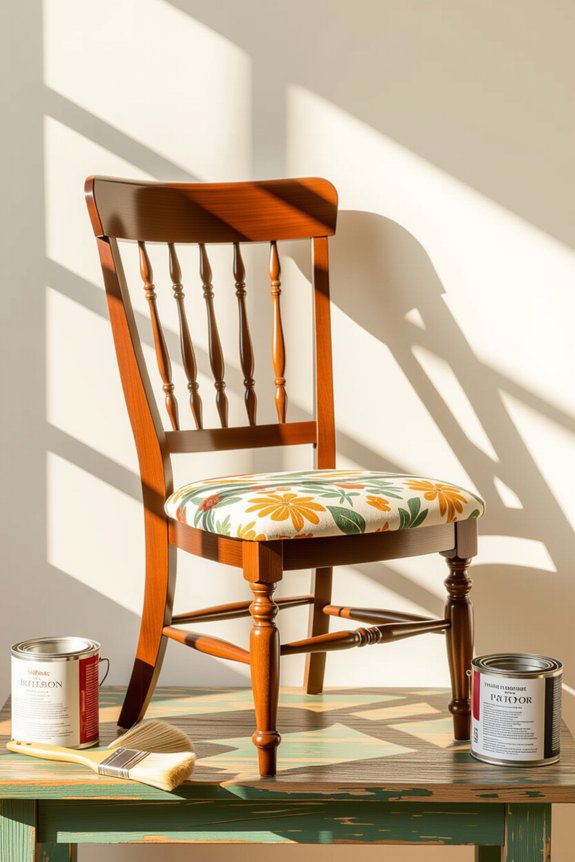
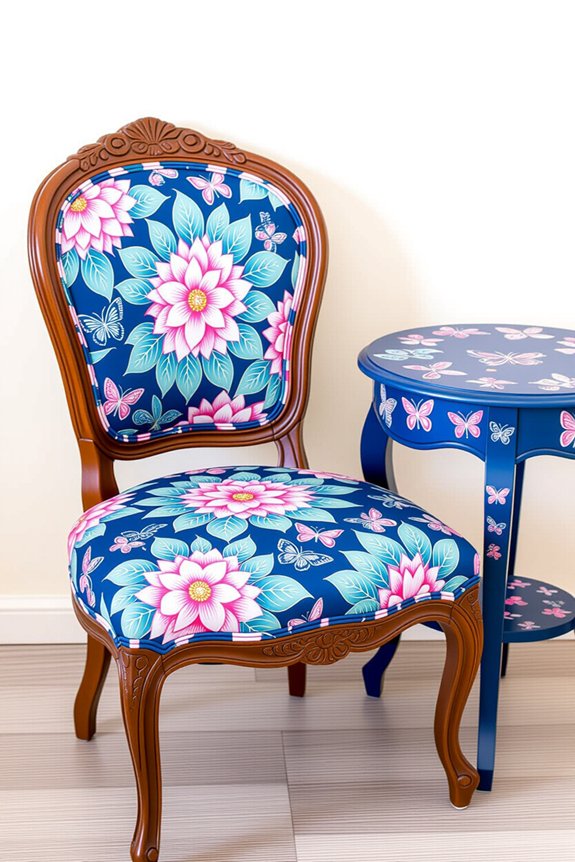
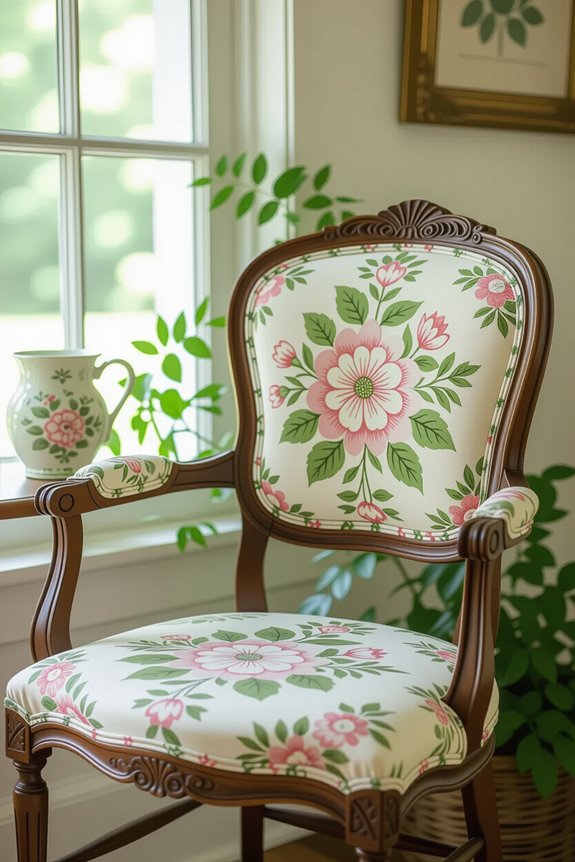
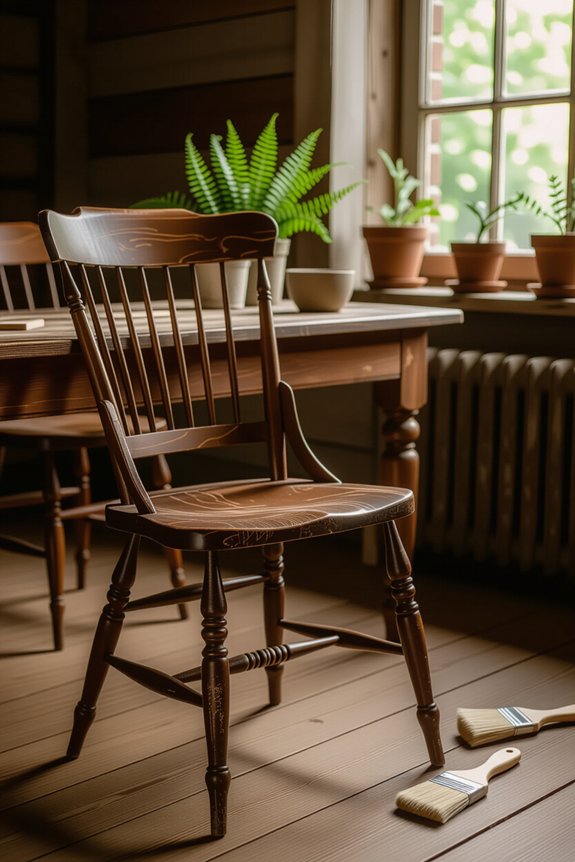
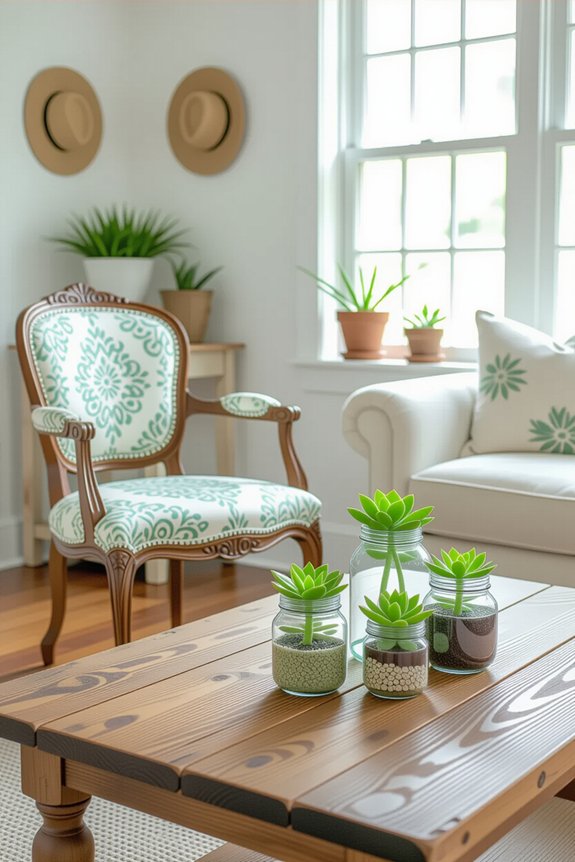
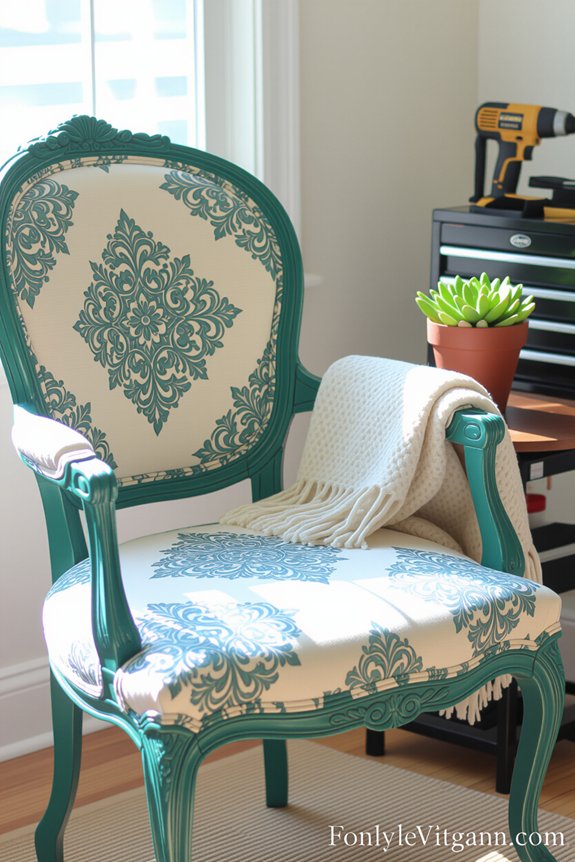
Reupholster Old Chairs and Sofas for DIY Makeovers
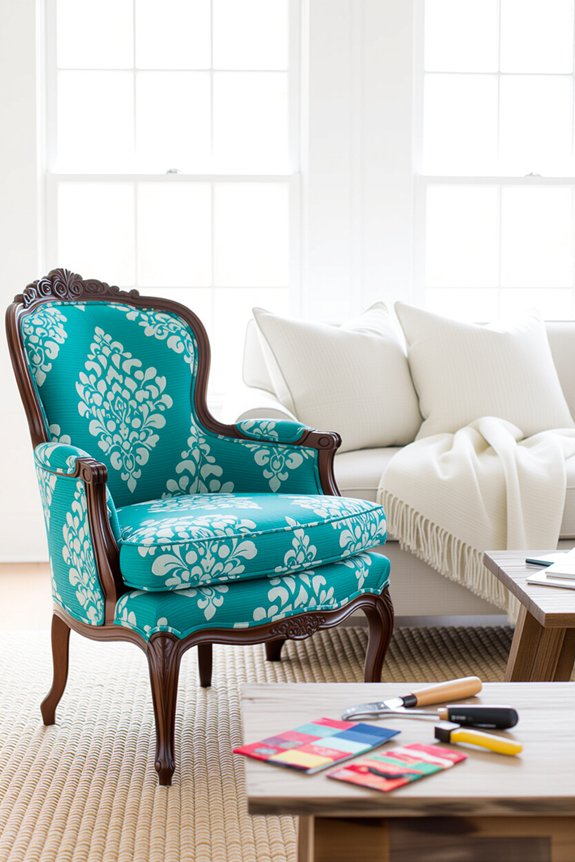
Reupholstering old chairs and sofas can be a delightful adventure, transforming tired furniture into eye-catching treasures! Imagine your favorite old chair, now dressed in vibrant fabric, ready to shine in your living room. It’s simpler than you think, and you’ll feel proud of your handiwork.
Here’s a quick guide to get you started:
| Step | Description |
|---|---|
| Choose Fabric | Pick a pattern that excites you! |
| Remove Old Fabric | Carefully take off the old covering. |
| Cut New Fabric | Measure and cut the new fabric to size. |
| Staple in Place | Secure the new fabric tight and smooth! |
With a little patience and creativity, you can breathe new life into your furniture. So grab that staple gun and get started—you’ve got this!
Add Texture With Fabric and Wallpaper
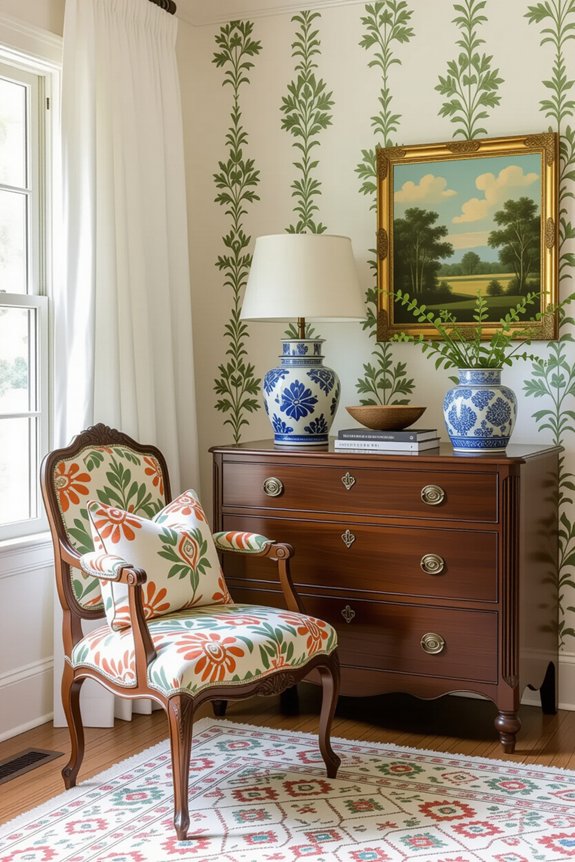
Adding texture with fabric and wallpaper can truly transform your space into something magical! You don’t have to be a pro to make your furniture pop. Here are some fun ideas to get you started:
- Upholster – Use bold or patterned fabric to reupholster cushions for a cozy feel.
- Accent Panels – Apply wallpaper to the back of shelves for a vibrant, eye-catching effect.
- Framing – Create fabric-covered panels to frame your old furniture, giving it a fresh look.
- Layering – Mix different fabrics like velvet and linen to create a rich, dynamic texture.
Get creative and don’t be afraid to experiment! Your furniture will thank you, and your friends will be amazed!
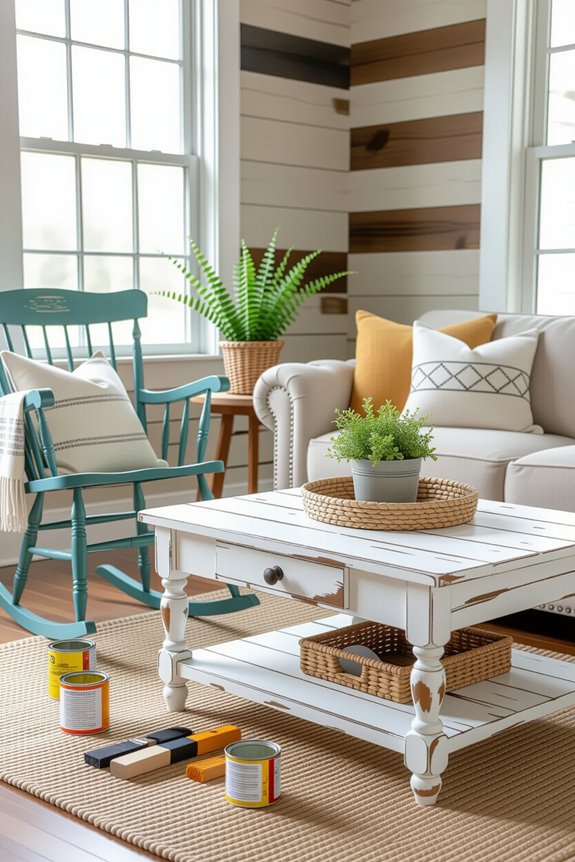
Transforming Wood Furniture With Stains and Finishes
Transform your wood furniture into stunning pieces with just a little stain and finish! First, pick a color that speaks to you, whether it’s a rich walnut or a bright cherry. Sand the surface to remove any old finish, then wipe away dust. Next, grab a brush or cloth and apply the stain, watching the magic happen as the wood grain comes alive. Don’t rush—let it soak in for a few minutes before wiping off the excess. Once it’s dry, protect your masterpiece with a clear finish. This step makes your furniture shine and keeps it safe from scratches. You’ll feel proud every time you see your transformed piece, and who knows? You might just inspire your friends to try it too!
Upcycling: Turn Old Furniture Into New Treasures
Have you ever looked at an old piece of furniture and thought it was destined for the junkyard? Well, think again! Upcycling is your chance to turn that forgotten item into a treasure you’ll love. Here are four fun ideas to get you started:
- Paint It Bright: A fresh coat of paint can totally transform your piece. Choose a color that makes you smile!
- Add New Hardware: Swapping out old knobs for quirky ones can make a huge difference.
- Reupholster: Give chairs or cushions a new life with fun fabric. It’s easier than you think!
- Create a Garden Planter: Turn an old dresser into a unique planter for your favorite flowers.
Get creative, and watch your furniture shine again!
Unique Designs With Decoupage Techniques
Decoupage opens up a world of creativity that can make your furniture pop with personality! You can transform plain pieces into eye-catching treasures using this fun technique. All you need are some beautiful papers, glue, and a little imagination. Think about how cool it would be to have a side table covered in vintage postcards or a chair adorned with colorful flowers!
Here’s a quick look at different decoupage styles:
| Style | Materials Needed | Best For |
|---|---|---|
| Vintage | Old book pages | Tables and chairs |
| Nature-Inspired | Floral wrapping paper | Storage boxes |
| Modern | Graphic prints | Shelves and cabinets |
Decorative Touches With Stencils and Transfers
Stencils and transfers can add a magical touch to your furniture projects, making them truly stand out. With just a little creativity, you can transform an ordinary piece into something extraordinary! Here are some fun ways to use them:
- Personalized Designs: Create unique patterns that reflect your style.
- Themed Decor: Match your furniture to your room’s theme, like beachy vibes or rustic charm.
- Quotes and Sayings: Add inspiring words to uplift your space.
- Layering Techniques: Combine stencils and transfers for a rich, textured look.
Don’t worry if you’re new to this—just take your time and enjoy the process! It’s all about having fun and expressing yourself. Your furniture will thank you, and so will your guests!
Add Storage to Vintage Furniture
When you’ve got a vintage piece that’s bursting with character but lacking in storage, don’t fret! You can easily transform it into a functional treasure. First, consider adding shelves inside cabinets or using decorative baskets. They’re not just useful; they can look cute too! If your vintage piece has empty space, think about adding a pull-out drawer or two. It’s like giving your furniture a little surprise inside. You can also attach hooks or hangers to the sides—perfect for hats, bags, or even your favorite scarves. Just imagine how great it’ll feel to have that unique piece serve a new purpose while keeping your space tidy. Let your creativity shine, and watch your vintage beauty come alive with storage!
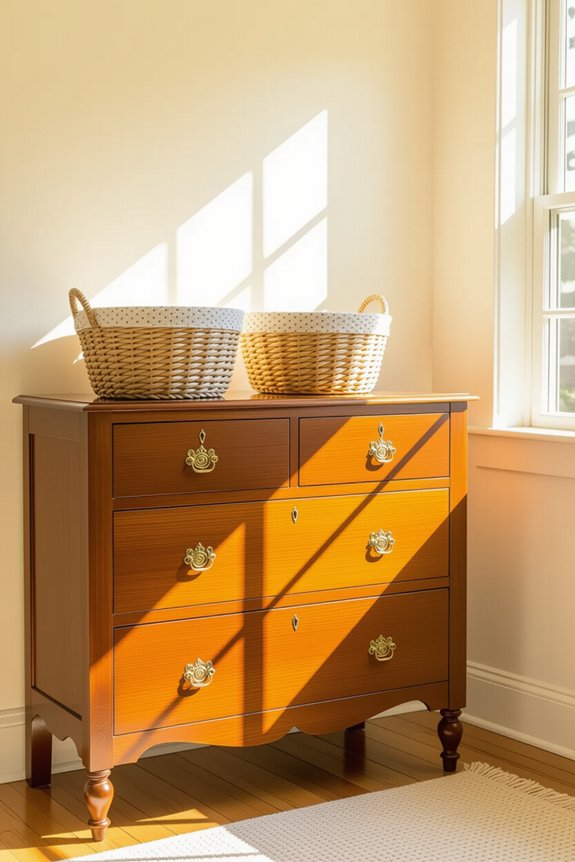
Revamp Dressers Into Stylish Storage Solutions
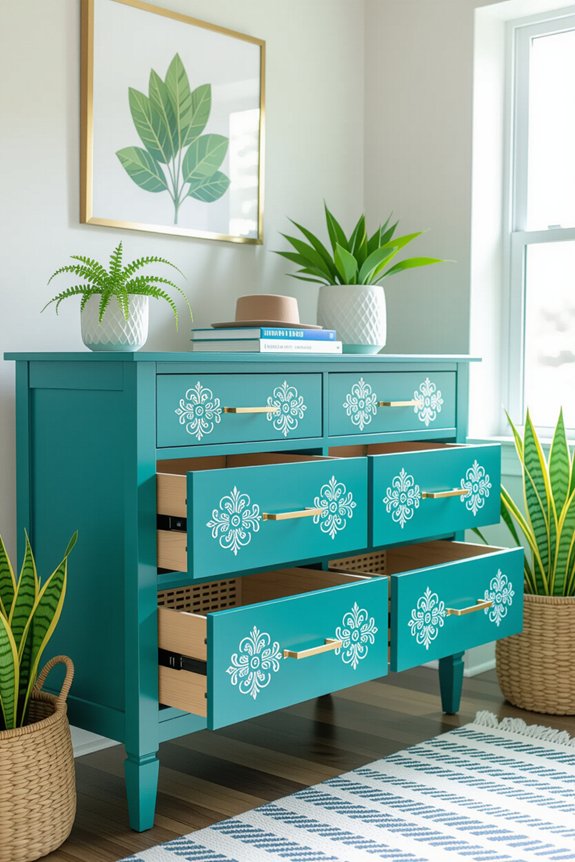
Revamping a dresser can turn it into a stylish storage solution that not only looks amazing but also helps you organize your space! You can easily transform that old piece into something fresh and functional. Here’s how to get started:
- Choose a Color: Pick a paint or stain that matches your room’s vibe.
- Replace Hardware: Swap out old knobs and pulls for trendy options; it’s like giving your dresser a new outfit!
- Add Dividers: Use fabric or wood dividers inside the drawers to keep everything neat and tidy.
- Incorporate Decor: Top it off with plants, books, or pictures to make it a focal point.
With these simple steps, your dresser will shine like new and keep your space organized!
Create a Statement Piece With a Bold Makeover
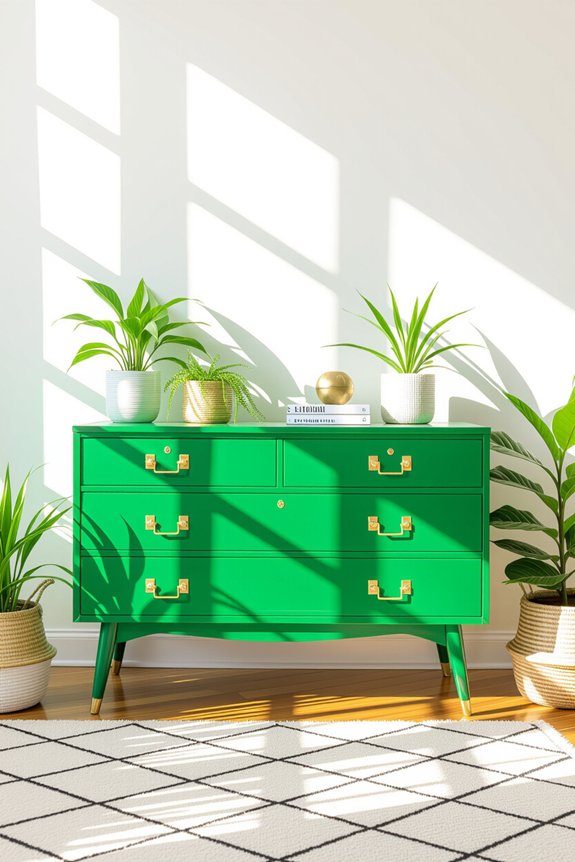
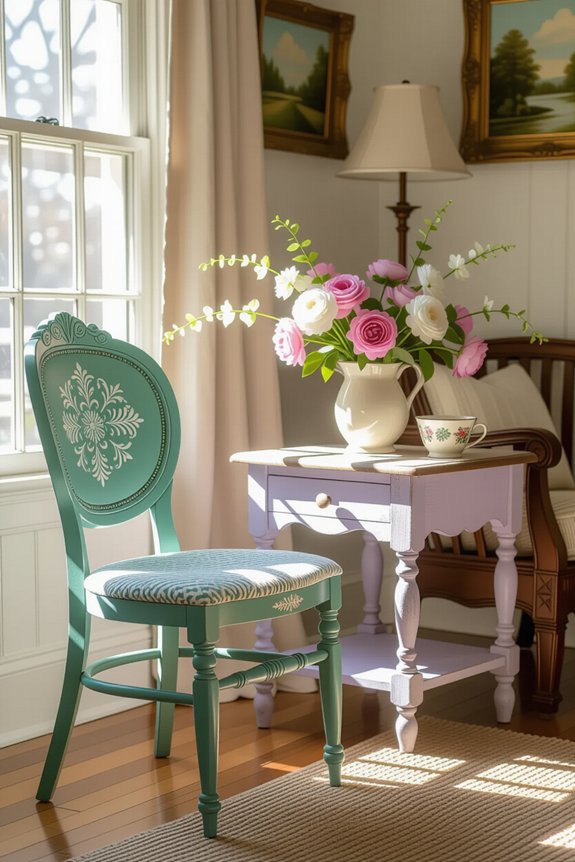
Creating a statement piece with a bold makeover can be one of the most exciting projects you tackle! Imagine transforming a dull chair or an old table into a stunning focal point that grabs attention. First, pick a fun color that makes you smile; bright yellows or deep blues can really pop! Next, consider adding unique patterns or stencils to give it personality. Don’t forget about hardware—new knobs or handles can make a huge difference. When you see your piece come to life, it’ll feel like magic! Plus, everyone will ask where you got it, and you can proudly say you made it yourself. So grab your paintbrush and let your creativity shine; you’ve got this!
When Should You Keep the Original Finish?
Sometimes, keeping the original finish on your furniture can be the best decision you make! It can add character and history that new paint just can’t match. Here are a few times when you might want to embrace that original look:
- Sentimental Value: If the piece has family history, preserving its finish can keep those memories alive.
- Unique Style: Original finishes can showcase unique craftsmanship and details that might be lost with a makeover.
- Condition: If it’s in great shape, why cover it up? A little polishing might be all it needs!
- Value: Antique pieces often hold more value with their original finish intact.
Eco-Friendly DIY Furniture Makeover Tips
Giving your furniture a fresh look doesn’t have to come at the expense of the planet! You can make over your old pieces while being kind to Mother Earth. Start by using non-toxic paints and stains that won’t harm your home or the environment. Upcycling materials, like old fabric or wood scraps, not only saves money but also reduces waste!
Here are some simple tips:
| Eco-Friendly Tip | Why It Matters |
|---|---|
| Use natural paints | They’re better for air quality! |
| Repurpose old fabrics | Reduces landfill waste! |
| Choose second-hand items | Saves resources and money! |
| Seal with natural oils | Protects without harmful chemicals! |
With these tips, you’ll feel great about your stylish, eco-friendly upgrades!
Maintenance Tips for Your Revamped Furniture
Once you’ve transformed your furniture into something beautiful, it’s important to keep that charm alive! Regular maintenance can go a long way in preserving your hard work. Here are some easy tips to keep your revamped pieces looking fabulous:
- Dust Regularly: Use a soft cloth to keep dust at bay; it’s like giving your furniture a little spa day!
- Avoid Direct Sunlight: Keep your pieces out of harsh sunlight to prevent fading. Your furniture deserves a comfy spot, too!
- Use Coasters: Protect those surfaces from water rings and scratches. Treat them like royalty!
- Reapply Finish: If you painted or stained, consider renewing the finish every few years to maintain that fresh look.
With a little love, your furniture will shine for years to come!
Budgeting for Your DIY Furniture Projects
When you start dreaming about your next DIY furniture project, it can feel like a fun adventure waiting to happen! But before you jump in, let’s talk budgeting. First, set a realistic budget that includes materials, tools, and maybe even some snacks to fuel your creativity. You don’t have to break the bank! Check local thrift stores or online marketplaces for inexpensive pieces. Remember, a little elbow grease can turn something worn into a treasure. Also, keep a list of supplies—you might find a way to reuse items you already have. This way, you’ll save money and feel super proud of your transformation. So grab your paintbrush and let those creative juices flow, because you’ve got this!
Common Mistakes to Avoid in Furniture Makeovers
Starting a furniture makeover can be a thrilling journey, but it’s easy to trip over some common mistakes along the way. To help you dodge those pitfalls, here are four key things to watch out for:
- Skipping Prep Work: Don’t rush! Cleaning and sanding your piece sets the stage for a beautiful finish.
- Choosing the Wrong Paint: Not all paints are created equal—make sure you pick one suited for furniture.
- Ignoring Scale and Proportion: Furniture should fit your space. A giant chair in a tiny room? Yikes!
- Neglecting Drying Time: Patience is a virtue! Rushing can lead to smudges and uneven finishes.
Avoid these slip-ups, and you’ll be on your way to creating something amazing!
Inspiring Before-and-After Makeover Stories
Transforming a piece of furniture can feel like stepping into a magical world, where old and forgotten items get a second chance at life. Imagine finding a dusty, chipped dresser in your attic. With a splash of paint and new knobs, it turns into a stunning statement piece! You might even stumble upon a worn-out chair that just needs a fresh fabric to shine again.
These before-and-after stories aren’t just about furniture; they’re about dreams coming alive. Every makeover tells a tale of creativity and hard work, making your space feel uniquely yours. So grab that paintbrush, embrace your inner artist, and let your imagination run wild. Who knows? Your next masterpiece could be hiding in plain sight!
Personalize Furniture for Your Home Style
Personalizing your furniture can truly make your home feel like a cozy reflection of you. It’s your chance to show off your unique style! Here are some fun ways to get started:
- Paint It: A fresh coat of paint can turn a drab piece into a vibrant statement.
- Add Hardware: Swap out boring knobs and handles for something fun and funky.
- Reupholster: Use fabric that speaks to your heart—floral, stripes, or even a wild animal print!
- DIY Stencils: Create designs that match your personality; it’s like giving your furniture a little tattoo.
Finding Inspiration for Your DIY Projects
Finding inspiration for your DIY projects can be like discovering hidden treasure. You might find ideas in the most unexpected places! Take a stroll through your local thrift store, or browse online platforms like Pinterest. You’ll see countless styles and colors that spark your imagination. Don’t forget to look around your own home, too! Sometimes, a fresh coat of paint or a new handle can work wonders. You could even ask friends for their thoughts—two heads are often better than one! Remember, your creativity is your superpower, so let it shine! Embrace the process, and enjoy every moment. Who knows? Your next project might just turn into a stunning masterpiece that everyone admires!
Frequently Asked Questions
How Can I Determine if a Piece Is Worth Revamping?
Imagine the warm glow of a freshly painted chair in your living room. To determine if it’s worth revamping, check its structural integrity, style potential, and sentimental value. If it sparks joy, go for it!
What Are the Best Ways to Source Materials for My Projects?
Check local thrift stores, garage sales, and online marketplaces for affordable materials. Don’t forget to ask friends or family for unused items. You’ll be surprised at what you can find and repurpose creatively!
Can I Use Regular Paint for Furniture Makeovers?
Using regular paint for furniture makeovers is like dressing up a canvas—it’s possible, but not always ideal. You’ll get better results with paint specifically designed for furniture, ensuring durability and a smooth finish.
How Do I Remove Old Paint or Finishes Safely?
You can safely remove old paint or finishes by using a chemical stripper, sanding, or heat guns. Always wear protective gear, work in a well-ventilated area, and follow product instructions for the best results.
What Should I Do if I Make a Mistake During the Makeover?
If you mess up, don’t sweat it! Just grab some sandpaper or a trusty paint stripper, fix the mistake, and try again. Every artist hits a bump—learn from it and keep rolling!